Posts

Showing posts with the label Railway

A Boring Water Tower

Image
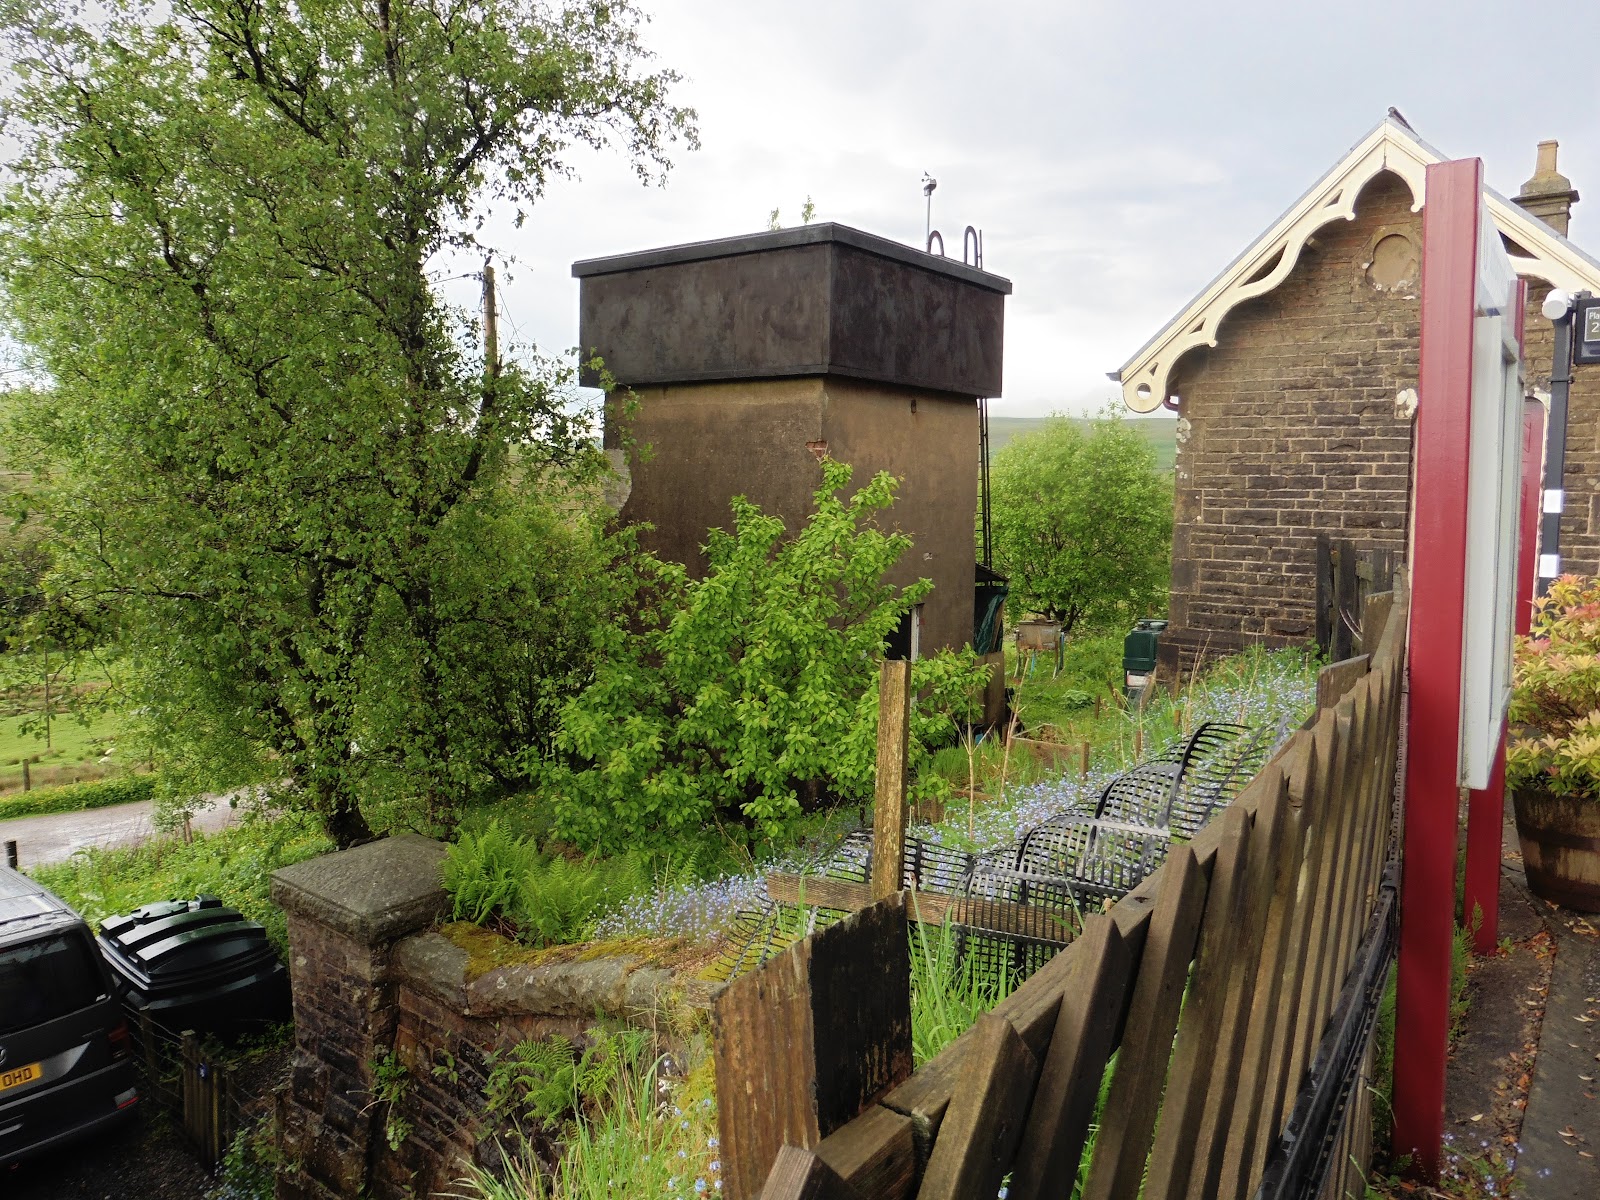
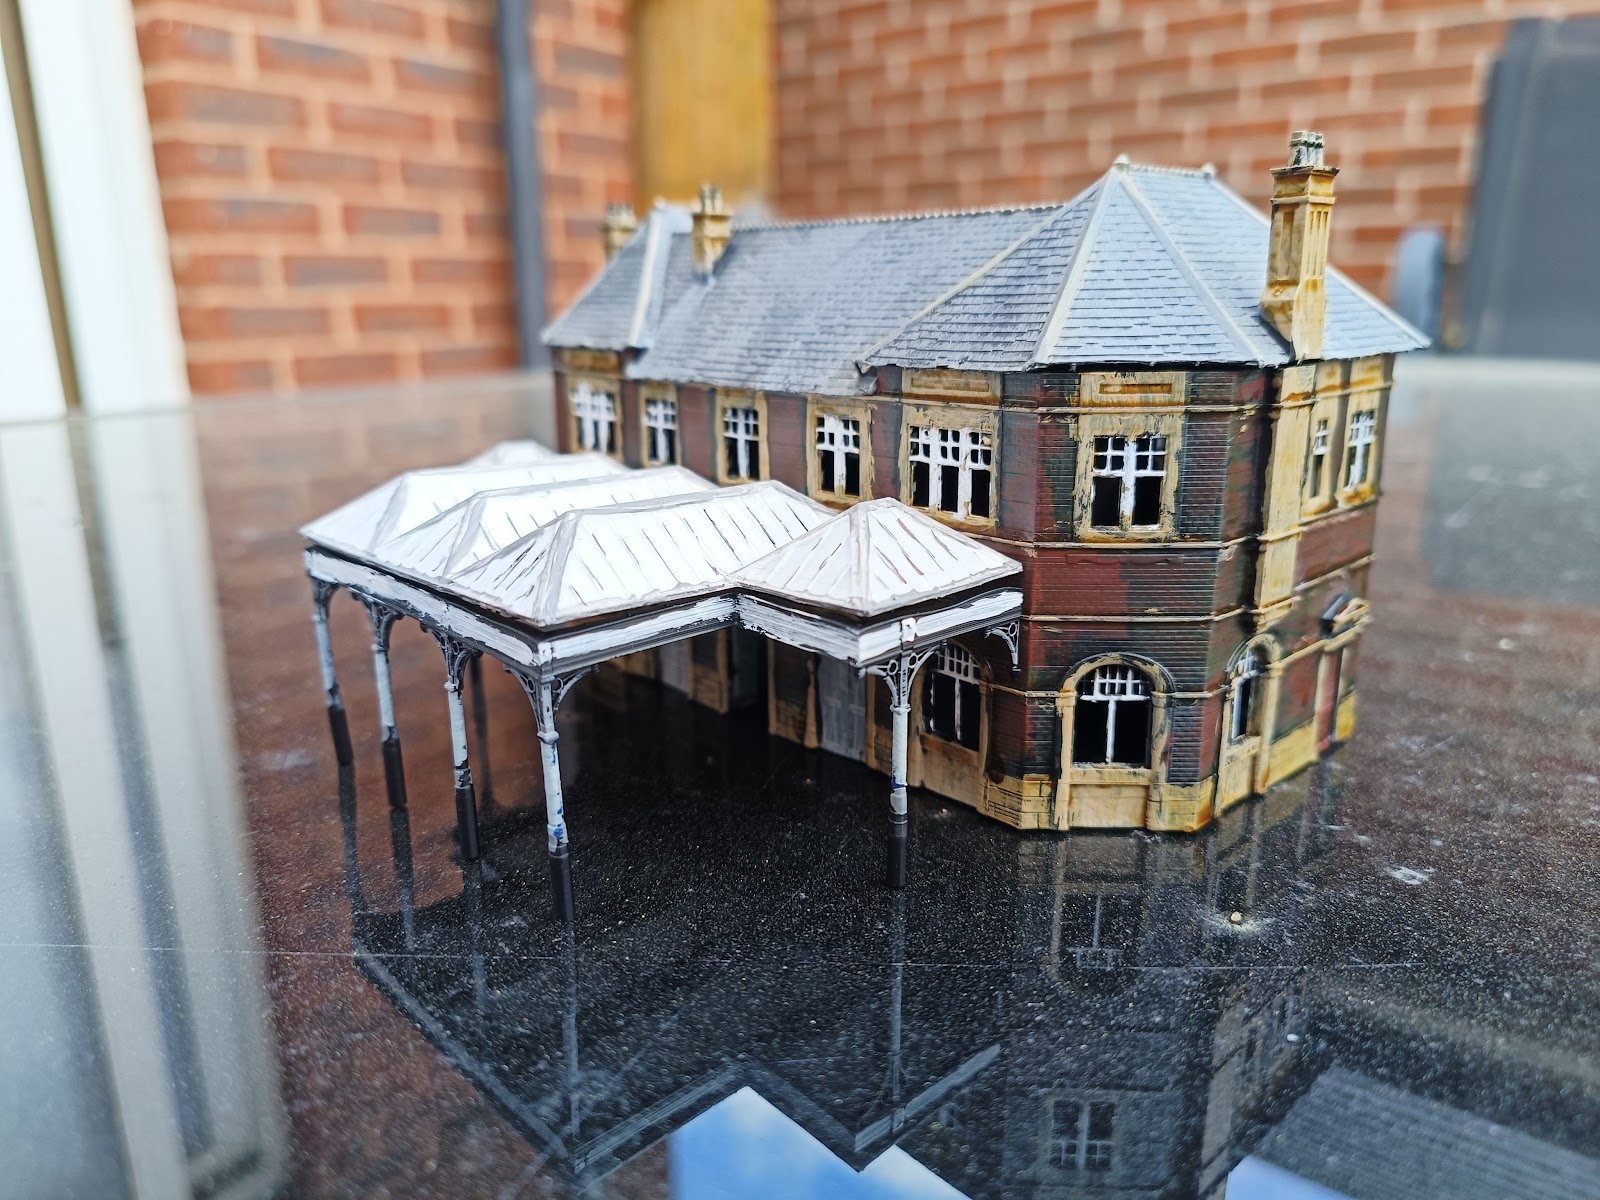
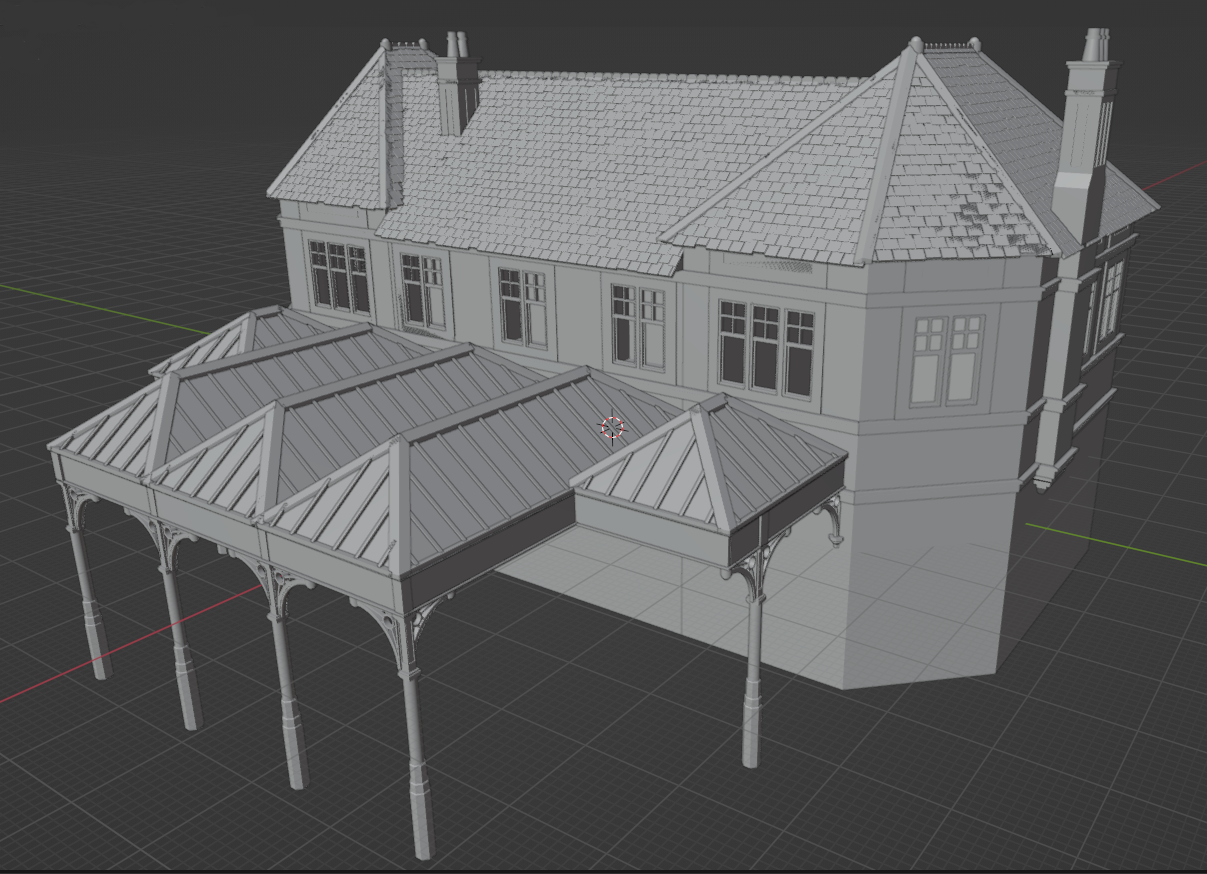
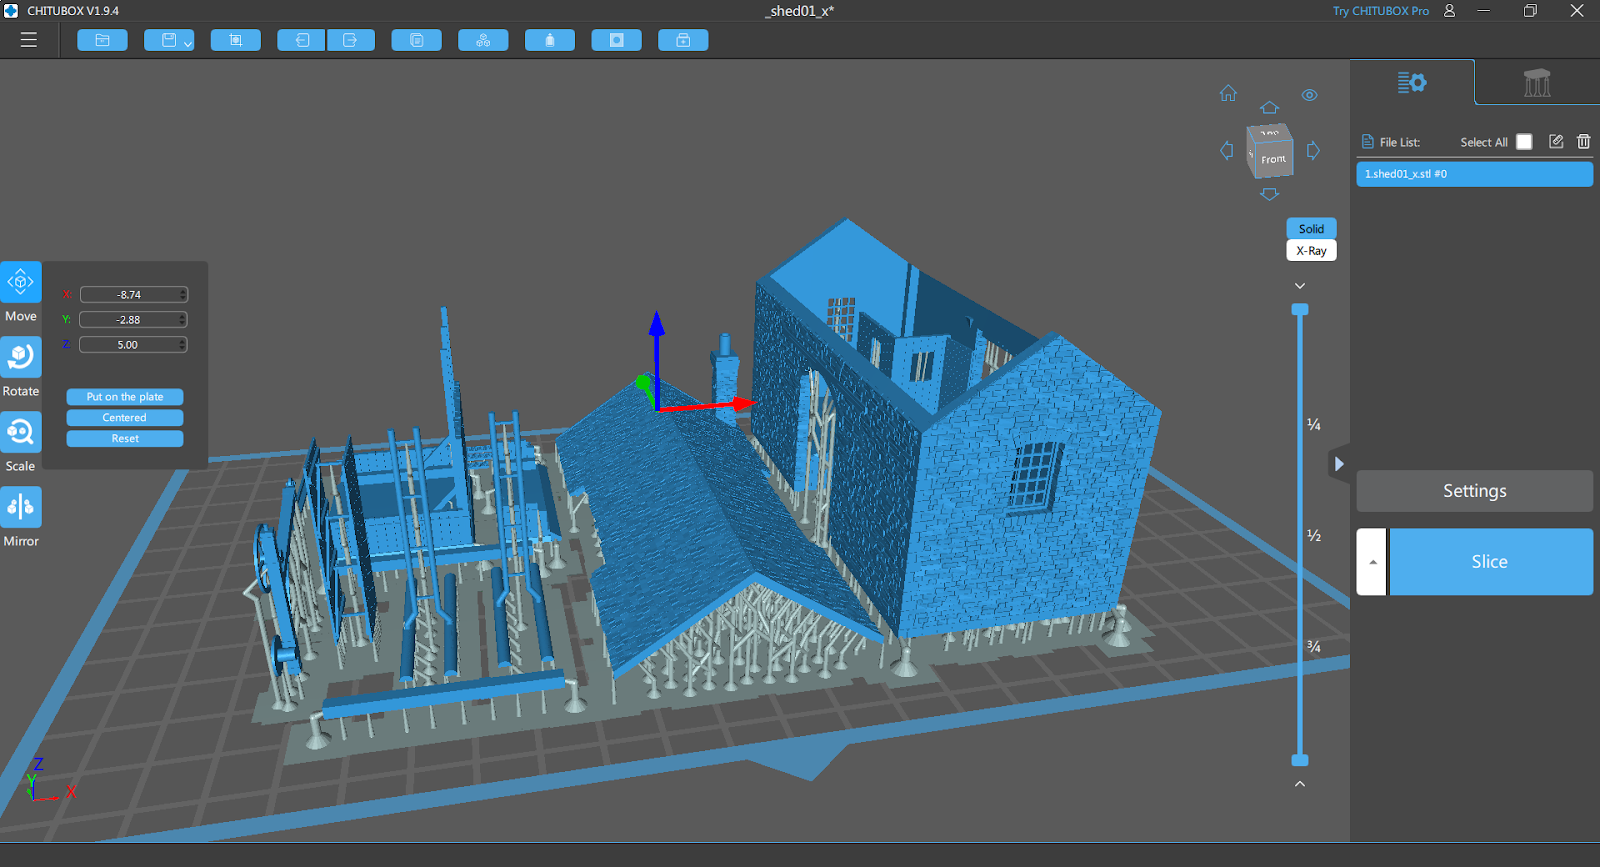
This is a model of small water tower that supplies to a row of railway cottages next to Garsdale station, and I asked to do this for a friend who is making a model of the station (and these are all his photos, used with permission). Here is what is looks like, and what I thought I was modelling - a metal box on a concrete box. That is two hollowed out cubes in Blender. Then I saw the other side. So that made it more interesting! Firstly, the concrete base has been sculpted to make it look chipped and worn. The metal lid has a slight sag. There is a ladder. The corrugated iron roof of the lean-to looks battered after applying a lattice modifier. The tarpaulin was made using a cloth modifier. I have put a couple of drums behind it - no idea what is there really. I printed this for a friend, and two months later he still has not painted it, so here it is in the raw. He is building a layout; once he is done, I will add better images.

Corfe Castle Station

Image
Corfe Castle is a small village in Dorset. The station is on the line from Wareham to Swanage, which closed in 1972, but was preserved along the Swanage end. Corfe Castle was the only intermediate station when part of the national network. It is an attractive station, with interesting rooves. I recalled that there was a plan and elevations in Railway Modeller in 1976, and managed to find it. I took a photo, used GIMP to remove distortions, then imported that into Blender. After sizing, I could them use that to get the proportions right. I visited the village in 2019, but did not make it to the station as I had the family in tow. I could just about see it from the castle though.

Settle Station

Image
I visited Settle with the specific intention to get photos of the footbridge, but ended up doing most of the station structures. NOTE: The station and most of the other structures are available to download on Cults3d; see my Settle and Carlisle collection! The Settle and Carlisle Line is a popular one to model. The Midland Rail had a standard design for buildings, so the main station building at Settle is essentially the same as that At Appleby, Kirby Stephen and other locations. The waiting room is even more ubiquitous. Here is that main building. This is the platform side. The door did not quite print properly, and the bits in the windows either side failed to and had to be redone - and are rather fatter than they should be but that is a limitation of the technology. But if you ignore that area, otherwise it looks pretty good. This is from the road side. No doors on this side, which is unusual. Was that to prevent draughts? The waiting room is very much in the same style. The water ...

Hydraulic buffers

Image
Buffers are there to stop locos and rolling stock coming off the end of the track. Hydraulic buffers give a degree of extra protection by absorbing some of the energy of the collision. They are fairly rare, but I came across a pair on Crewe station on the bay platforms on the north side. A photo of the same buffers from 1975 can be seen here . I do not know how hydraulic buffers work, but I guess... The red cylinders are hydraulic pistons full of oil. On impact, slides into the piston, forcing the oil into the reservoir - the blue tank - via an orifice. The orifice restricts the flow, arresting the speed of the impact. How effective they are I do not know. Hard to see how a 100 te train travelling at 40 mph is going to be stopped. As far as I can tell, there is no hydraulic buffer available in N gauge. I did a single buffer, then mirrored it in ChiTuBox. If I print out more, I would do the buffers and sliders separate so they can be readily replaced if the snap.

Wylam Signal Box

Image
Wylam signal box is distinctive as it is built across the tracks; it is Grade II listed . This style was quite popular on the line from Carlisle to Newcastle, and two still exist, the other at Hexham. The Wylam example is excellent because you can get so close. The station is split either side of a level crossing, with the signal box right in the middle there too. It makes for an impressive model. Overhead signal boxes presumably had the advantage of using less land, making them cheaper, and give a better view presumably, but I would guess the rods connecting to points are more complicated, with an extra three or so joints. Wylam signal box is about 20' deep, and 42' across. I am guessing about 40' high, with 16' clearance. The Hexham signal box, which I visited the same day, is a little bigger. It spans three lines, and controls a rather bigger station. This is as close as I could get (and my phone camera has no zoom!).

West Bay Station

Image
This is a station in Dorset; I have never been there, so no photos! I heard about it from a thread here . It closed in 1930, but remarkably the building is still standing and in good condition. It is now used as a restaurant, and has two coaches at the platform. There is a great photo here , and an article about the station here . I printed it in three parts: the platform, including the fence; the canopy; and the building itself.

Towneley Signal Box

Image
This is a small signal box on the line from Preston to York, just southeast of Burnley. It continued in use to around 2013 - one of the last in use in East Lancashire - as it guarded the level crossing where Hufling Lane crosses the railway. The signal box is south of the road, and east of the track. Until 1952 there was a station, on the north side of the road, and there are several useful photos on the Disused station web site . According to that site: The signal box was initially  on the up platform, adjacent to the level crossing, but it was replaced in 1878  with a box south-east of the crossing, again on the up side of the tracks. The  new box was a Saxby & Farmer Type 9, originally containing a 26-lever S&F frame, but fitted with a new 24-level LYR frame at a later date.  My model is how it was in around 1980, with the lower windows bricked up (which had happened by 1960 I think), but before the lower half of the upper windows were boarded up and the t...

Wigan Wallgate Station

Image
 This follows on from here . I have now printed and painted the model. I was printed in four parts; the roof, the roof of the canopy, the supports for the canopy and the main building. I tried doing the canopy as one piece, but it was too difficult cleaning off the supports. I was not sure the canopy roof is quite right. It has a high gloss on it that I hoped would look like glass, but really does not! Here is a replacement. For reference, this is the real thing. Colours really not right....

Wigan Wallgate Station (WIP)

Image
 I am some way from printing this, but thought I would show the work-in-progress. Stations on bridges are very common on model railways as they save space, but are considerably less common in real life, I guess because of the extra expense of providing infrastructure to support the building. Wigan Wallgate station is one such example, so seems ripe for modelling. The prototype was opened 2 February 1896 by the Lancashire and Yorkshire Railway, replacing an earlier station the other side of the road. Obviously the ground floor windows and doors are still to be done, and these are arched so a bit more complicated than the first floor windows. It then needs bricks adding. the real pain-in-the-neck job was the slates, so it feels this is not far from done. Then there is printing it.

LSWR good Shed: My First 3d Print

Image
This is my first proper success. The first actual print was a pair of rooks from a file included with the printer. I tried to print Preston City Mission, but the supports swamped the model, and it will need to be redesigned with the roof separate. I also printed a "tip-air" hopper body, which was fairly successful, and may be the subject of a later post. So this is using my new Elegoo Saturn 8K. This took three attempts, and the issue is supports. The parts are printed 5 mm above the build plate, on lots of little legs, and if the legs are too thin or too few, the part drops off during the print. I found, using ChiTuBox, you need intermediate supports with additional heavy supports at the corners of anything of any size. This is the second attempt, which did not have good enough supports and the main part fell off. After printing, the parts are washing in iso-propyl alcohol, then UV cured for about 5 minutes - I have an Elegoo curing station to do that. Then the supports are ...