Posts

Showing posts from November, 2023

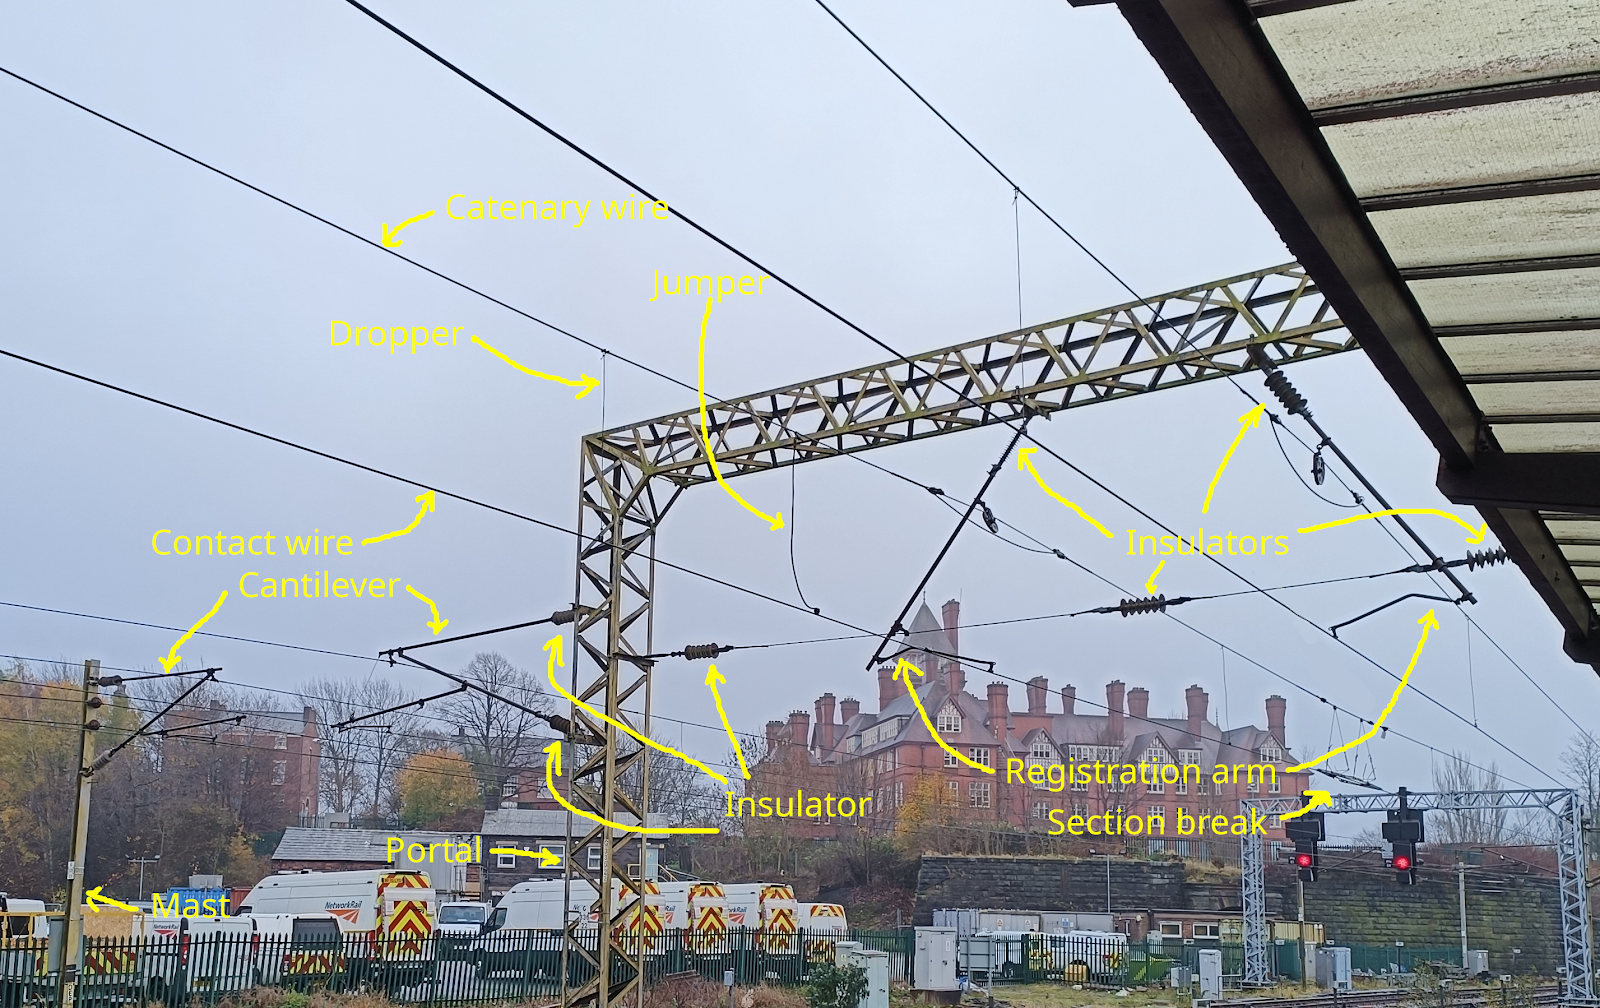
25kV Overhead Line Electrification

Image
This article is now available here:  http://www.prestonanddistrictmrs.org.uk/articles/electrification-infrastructure/

Towneley Signal Box

Image
This is a small signal box on the line from Preston to York, just southeast of Burnley. It continued in use to around 2013 - one of the last in use in East Lancashire - as it guarded the level crossing where Hufling Lane crosses the railway. The signal box is south of the road, and east of the track. Until 1952 there was a station, on the north side of the road, and there are several useful photos on the Disused station web site . According to that site: The signal box was initially  on the up platform, adjacent to the level crossing, but it was replaced in 1878  with a box south-east of the crossing, again on the up side of the tracks. The  new box was a Saxby & Farmer Type 9, originally containing a 26-lever S&F frame, but fitted with a new 24-level LYR frame at a later date.  My model is how it was in around 1980, with the lower windows bricked up (which had happened by 1960 I think), but before the lower half of the upper windows were boarded up and the toilet added at the

Wheelie Bins

Image
I printed these out at both 4 mm/ft scale and 2 mm/ft scale. At larger scale they look good. I have seen wheelie bin models available for sale, but not open or partially open. At smaller scale the imperfections become rather more apparent. Still a success, I think, but not good for photos!

Steel and Plastic Drums

Image
These drums are about 6 mm high. Most are printed on pallets as I figure that is easier to handle them. The pallet on the right has four plastic drums on it; the rest are steel.  

Introduction to the Blog

 My first post was back in February - before I had even purchased a 3d printer, and it is now November and I am writing the introduction... This blog is all about my experiences for 3d printing. It is a way for me to share what I learn along the way, and to show off what I have created. Most pages are tagged Model and are about a specific model, and the prototype it is based on. Generally I try to visit the prototype, and include a couple of photos of that for comparison. I also try to learn the history of the building, which is not always easy, and record that on the page too. A lot are buildings in and around Preston, as that is where I live. Models are further divided into Building , Railway (i.e., railway-related buildings), Feature (bridges, tunnel portals, etc.), Rolling Stock and Clutter (smaller items) In addition, there are pages tagged How to and Prototype . If you want to know how to use Blender to make 3d models, there is an article I wrote on another site.

Keeping Warm

Image
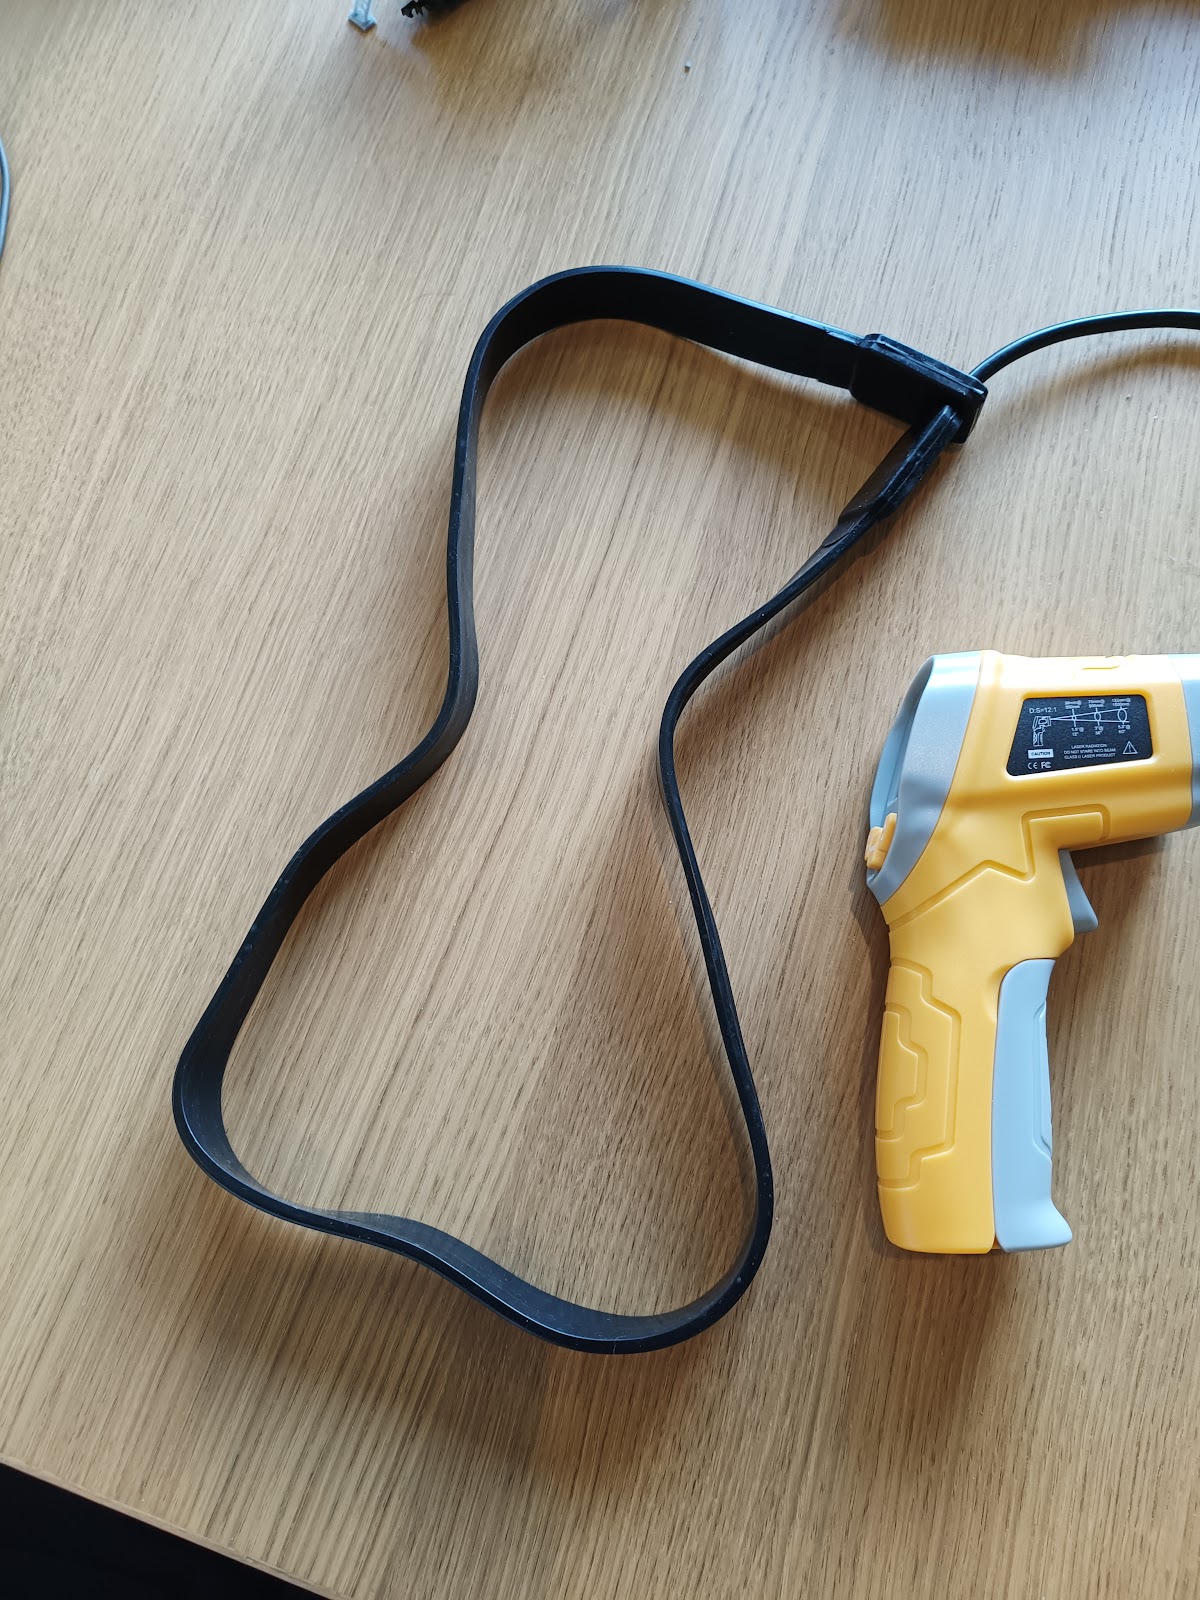
I keep my 3d printer in the garage, which is not heated and is detached from the house. Today the BBC reports the external temperature is 3°C, and I guess the temperature inside the garage will be similar.  3d printing does not work well at low temperature. Chemical reacts are very temperature dependent, and I guess that will apply to the cross-linking process, even though it is "powered" by the UV light. Another factor is the viscosity of the resin, which is important because with each the plate rises up, and the resin has to flow into space, and then back out as the plate goes back down. To circumvent that, I have purchased a heating strip designed for home brewers to keep their fermenting beer warm. It has a controller (not visible in the image). The controller has a dot on the knob, and a series of dots on the housing, but the latter are not much help as the dot on the knob goes well beyond them. I will there estimate the angle in degrees clockwise from the mains-in lead.

BRUTEs

Image
BRUTE stands for British Railway Universal Trolley Equipment, and was basically a cage on wheels for moving parcels and other items around a station. Some wagons were converted so that BRUTEs could be wheeled straight on, reducing handling. Swindon Works was producing about 200 of these a week in the mid-sixties. This is the model in 1:76 scale. I tried 1:148 for N gauge at the same time, but only the bases printed. Even at the larger scale, there were print issues. The one at the back has gone very wrong. Others have minor issues, but I think are still useable. the prototypes were pretty battered. From Blender: From a modelling perspective, what makes this interesting is that one side had a canvas curtain, and that meant I had to learn about the "cloth" modifier in Blender. Each curtain is a sub-divided plane, with a curve modifier to give depth. The cloth modifier is added after that. I used the defaults, except that I added weight. Then I hit play on the animation toolbar,

Bad normals

Image
This is an issue I hit whilst revising Lund Church. A model is made up of polygons, and each polygon has a front and a back. In Blender it is not obvious which is which, though Blender does track it. And occasionally it gets it wrong, and a section of mesh is, in effect, inside-out. When you try to print out, there is just a hole there. In the image below you can see some of the stones to the left of the windows are not just missing but also caused holes in the superstructure. Microsoft 3D Builder does not spot it, all looks good in there. But Chitubox does. It will not actually say anything or stop you producing a bad file, but it does highlight bad bits in your model. In the image below, all that roof is wrong, the right side of the arches, a part of the cross at the end of the roof, and some stones in the tower. All are shown in a much darker colour. So what are normals? Behind the scenes Blender creates a vector (essentially a line) that starts from the centre of the polygon and ex