Posts

Showing posts from May, 2025

Blender's Lattice Modifier

Image
I have recently been using the lattice tool more and more. It is excellent for gently deforming an object. A lattice is a primitive type in Blender. To add a lattice, go to Add - Lattice . Note that the default size is a 1 m cube, so half the size of the default cube. A lattice is a 3-dimensional array of points, and by default is just two in each direction. If you go to the properties pane, you will find it has its own tab, and you can vary the number of points in each dimension, from 1 upwards. In practice, there is not much point is more than five or so. Rather than x, y and z, it uses u, v and w, I guess because it can be rotated. On its own a lattice is not much use. You need to combine it with an object. To do that, add a modifier to the object Deform - Lattice , and then link to the lattice. You also need the lattice to be is the same location as the object, and completely enclosing it, So far the object will not be changed; select the lattice, and go into edit mode. Now move on...
Use a screen protector

Image
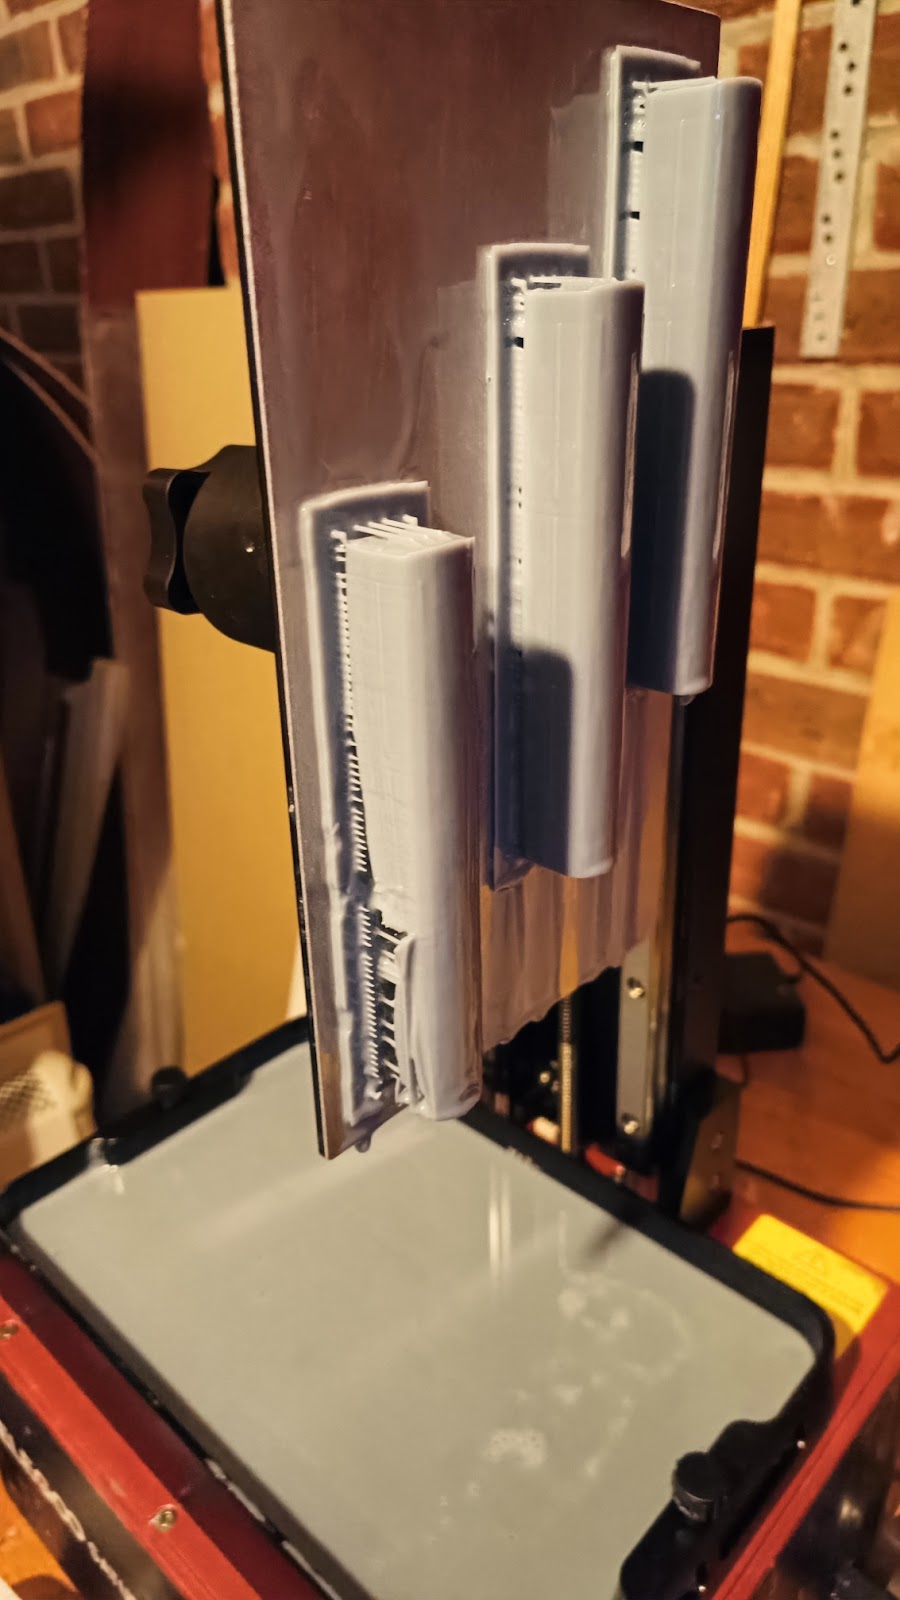
I had an issue recently that prints were failing at the same place on the build plate. I posted this image on an Elegoo support group of Facebook, but the answers were not convincing. These are three identical models, but only one is failing, and when I did other models they failed at the same place. It is not an issue with the model, or how it is orientated, etc. It is also clearly not levelling as that would apply across the entire build plate if it happened in the middle of a print as the entire baseplate is at the same level - more likely the base would not print properly. I was worried the screen might be faulty - that would give bad results in just one region - though you would think it would give vertical holes where the pixels failed. So what about an issue with the film on the base of the vat? I emptied the vat, and it looked okay. Not perfect, but as good as it did after a few uses. What I did notice the screen had resin on it. I have not had a leak, but resin seems to get ev...

The 3D Cursor in Blender

This is getting into minor details of Blender, and you can get by quite happily never knowing it. This post is more a way for me to record what I have discovered. The 3D cursor is a point in space in the Blender virtual world. When you create a new object, it will be created here. By default it is at the origin, and that is often fine, but occasionally you want to move it - perhaps to get it back to the origin because you moved it by accident, or perhaps because you are working well away from the origin. Certain operations use the 3D cursor as their centre, and being able to move it is help then too. Note that the cursor also has a rotation; I have yet to find a time when it is useful to change that. Here are the various ways t move the 3D cursor. Cursor tool Select the Cursor tool in the Toolbar, then left click where you want the cursor. I think it maintains the current depth. That means if you do this while aligned to, say, the x-axis, the x value will not change. If you are not ali...

It's All Gone Horribly Wrong!

Well, not right now, but what do you do if it does? And what precautions can you take in case it does? Note: This is about using Blender, not printing, which is a whole other level of horribly wrong! Save The first point is to save, and when you do something that could go horribly wrong, save first, and then savewith a different file name, and then do it! Blender keeps a copy of your last save, with the extension "blend1". You can set it to keep more old versions in  Edit - Preferences - Save & Load . Not something I have done, but it depends on your style of work. Undo The first thing to try is to Undo . Just hit [ctrl]-Z until you get back to where it was good. Blender counts every selection or unselection as a step, and you can quickly get to the Undo limit. I would strongly suggest increasing it to 256. There is a memory limitation so if you hit problems, you may need to reduce it. Go to Edit - Preferences - System to find the setting. I have once gone back 256 times...

A Boring Water Tower

Image
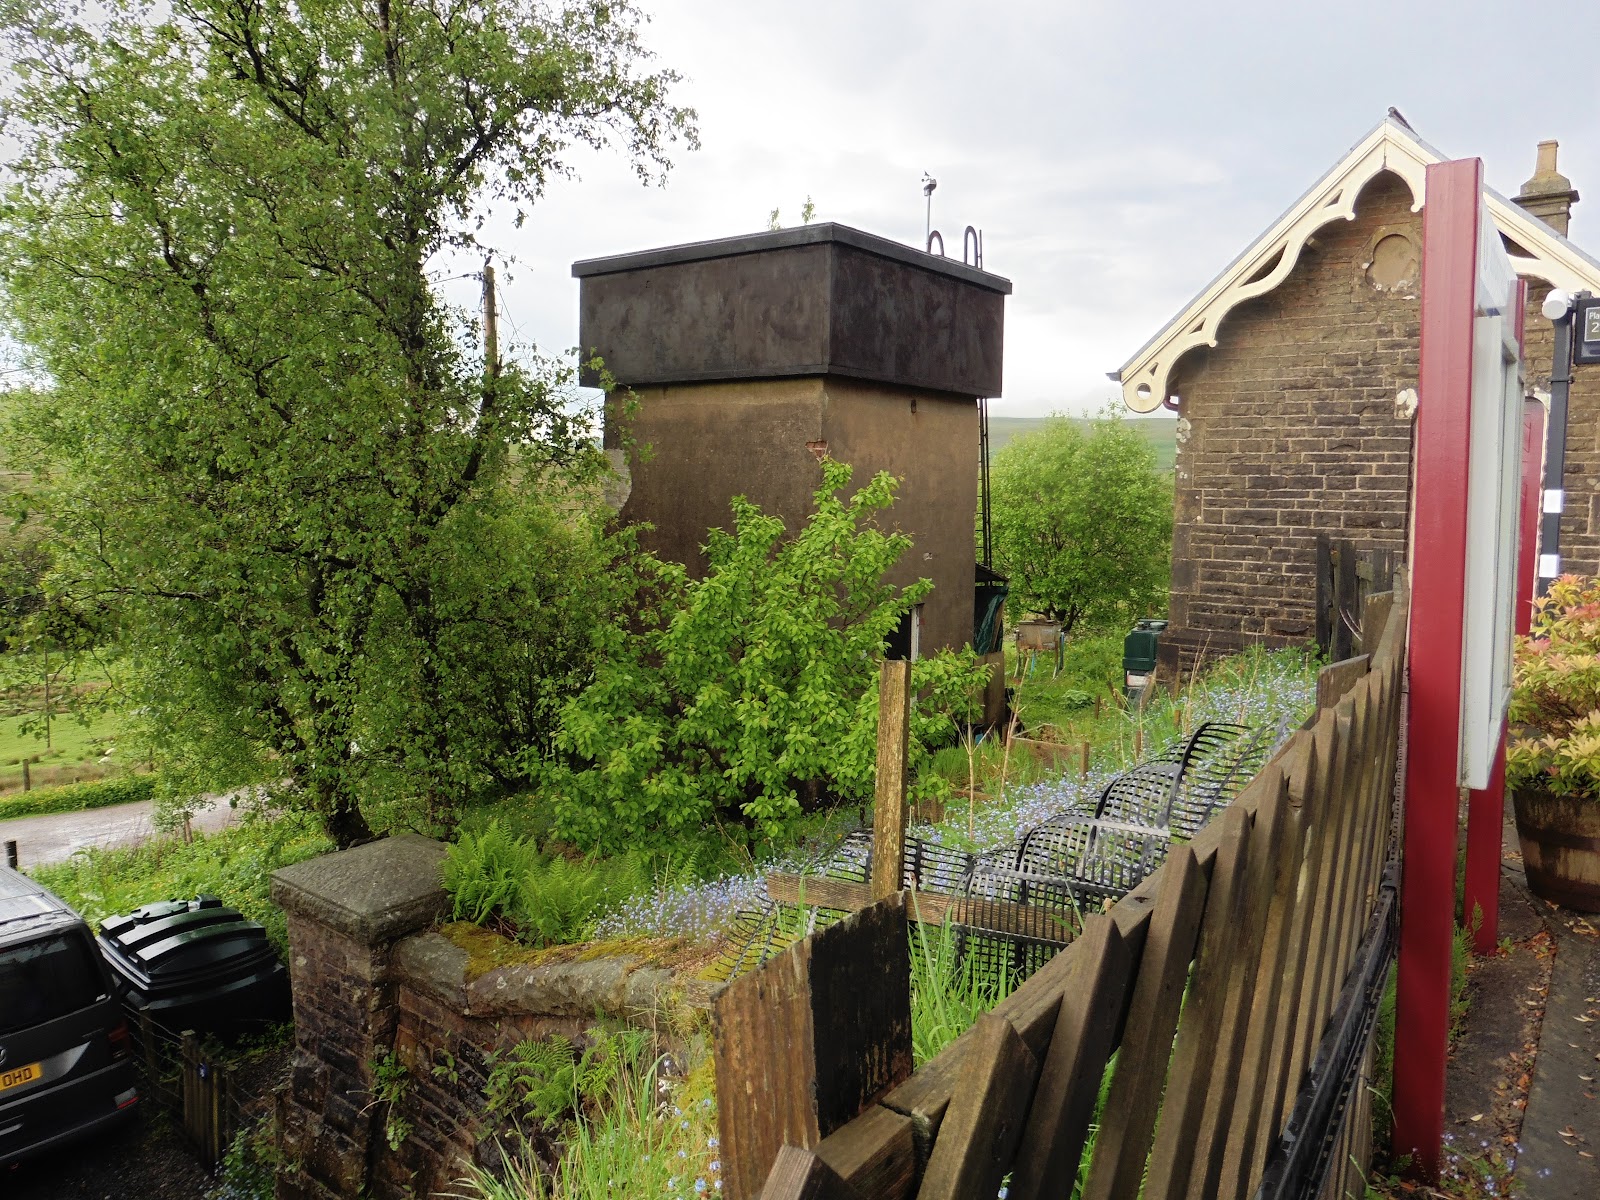
This is a model of small water tower that supplies to a row of railway cottages next to Garsdale station, and I asked to do this for a friend who is making a model of the station (and these are all his photos, used with permission). Here is what is looks like, and what I thought I was modelling - a metal box on a concrete box. That is two hollowed out cubes in Blender. Then I saw the other side. So that made it more interesting! Firstly, the concrete base has been sculpted to make it look chipped and worn. The metal lid has a slight sag. There is a ladder. The corrugated iron roof of the lean-to looks battered after applying a lattice modifier. The tarpaulin was made using a cloth modifier. I have put a couple of drums behind it - no idea what is there really. I printed this for a friend, and two months later he still has not painted it, so here it is in the raw. He is building a layout; once he is done, I will add better images.

Pipes

Image
I work in the chemical industry, and I find all the pipework going round factories fascinating. Often all there is in the pipes is steam and water - where I work that is the case, which is a relatively small site. NOTE: The models discussed are available to download from my Cults3d pages. See the Chemicals by Rail collection! This example is from Liverpool Docks, and I would guess the large pipe contain steam, the smaller would include a condensate line, returning condensed steam back to the boiler, and maybe hot and cold water. The system at Liverpool docks is unusual in that the pipes run at high level, coming down to ground level only where they are accessed by a building. It is more usual for the pipes to run along the ground, and then jump over roads and railways. Large sites often have chemicals in the pipes, and that can result in a lot of pipework, as this view of Stanlow oil refinery shows. The decline in the UK chemical industry means that smaller sites are pretty rare now, ...

96602-96609 - Motorail Van (side-loading)

Image
This is a rather obscure wagon that was converted from a mark 1 coach. It seems to have run in pairs, and there may have only been two of them; image here . It was an experiment by GWR (the modern company), between 1999 and 2005, and seems to have failed as a business. They were later used Network Rail Brake Force Runners, and there are photos of them in that role here . It is not my era, but people were expressing an interest on a thread on the N Gauge forum, and suggested they would be happy to pay, so I had a go. It is a pretty straightforward model, but took me several goes to get it right - in particular to get the height right on the chassis, a Lima BG, but eventually I got there. Two coaches each were dispatched to three gentlemen. The first time I have posted models, and the first time I have posted a parcel at all for a good five years. Here is an early photo back - still waiting for transfers.

Linked Duplicates

Image
I duplicate objects in Blender all the time - often as a quick way to get another cube or cylinder. Just press [SHIFT]-D. I usually hit [ESC] to stop the duplicate moving, so I can then position it more accurately. When you create a duplicate, you may notice a "linked" check box in the action properties box bottom left. If you tick it, the copy and the original will be linked, and any changes you make in Edit mode on either one will get applied to both. Alternatively, do [ALT]-D, and the box will be automatically ticked. Changes in Object mode - rotation, scale and translate - will not be copied, and neither will modifiers. In this simple example, I copied the standard cube normally to get the second box ([SHIFT]-D), but then created a linked duplicate to get the third box ([ALT]-D). When I then edited the third box, the second was changed too. This is very useful for when you have a lot of the same time and there is a chance you to adjust it later. I investigated this when d...

Class 76 (EM1) model

Image
I discussed the prototype in a previous post . This was my first successful attempt at printing a loco. The big issue are firstly finding a suitable chassis, and secondly getting your model to fit said chassis... It took me three prints before I got that right. As usual, it was designed in Blender, and is not that complicated a model. It is basically a box, with slightly thinner boxes at each end, and a curved roof. The chassis is a Dapol Hymek, and is no a great match, the class 76 had very long bogies, but it is the best I am going to get, and is acceptable to me. Dapol sell them without the body. For new , it is not great; it is a little temperamental until it gets going, and quite noisy.  The pantographs are from Kato and only a couple of quid for the pair. The windows are "Glue n Glaze", which is great, but there is quite an art to using it. The black version has blobs where I added a little too much, but mostly on the other side! The blue and yellow are Ammo paints, sol...