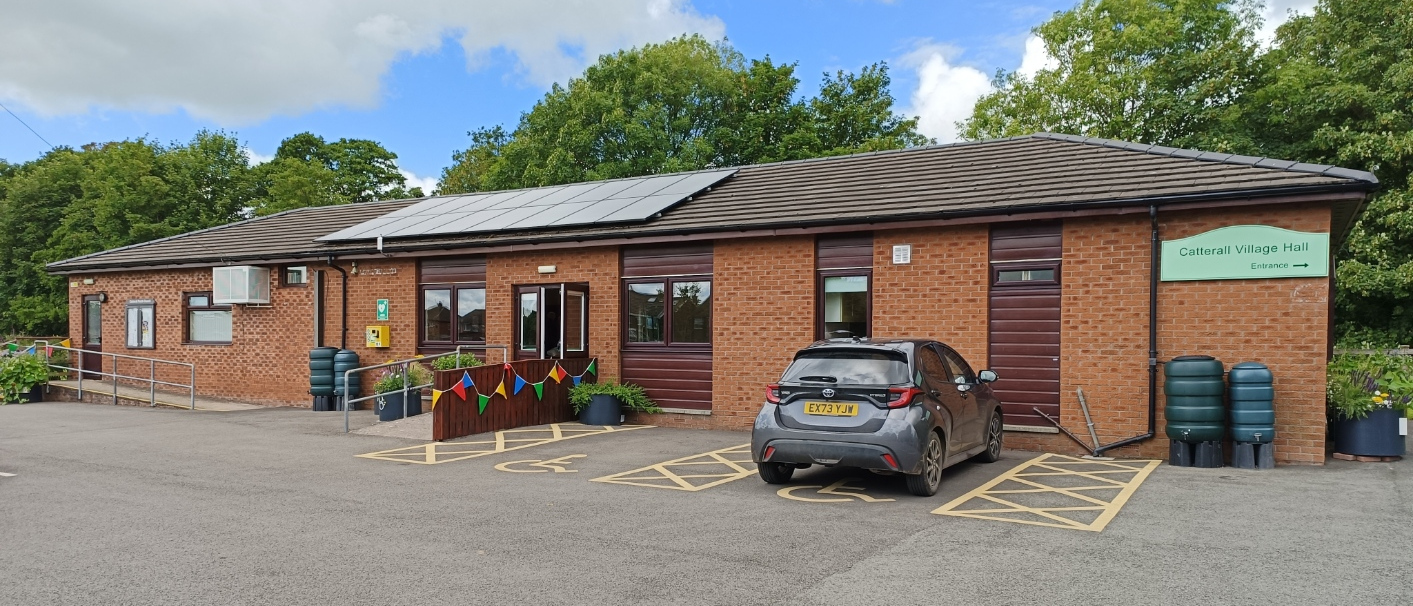
Catterall Village Hall
At a recent event, I was demoing Blender, with the plan to create a virtual model of the venue over the course of the day. As it turned out, I spent too long talking to people, and did not get that far. I did get it finished a few days later, however, so here is a description of the creative process.
Preparation
I starting by getting some basic dimensions from Google maps. Zoom in as much as you can then right click in one corner of the building, and select "Measure distance", then right click an adjacent corner and select "Distance to here". You can then drag the two points around to get other dimensions. I always round to the nearest even number of feet.

Basic Creation
Once I had the basic dimensions I fired up Blender.
For some general instructions on using Blender, see here:
The starting cube can be re-sized by typing the numbers into the panel on the right. The basic cube is 2x2x2, and if you just type the number of feet in the scale, it will give the right size in mm for N gauge.
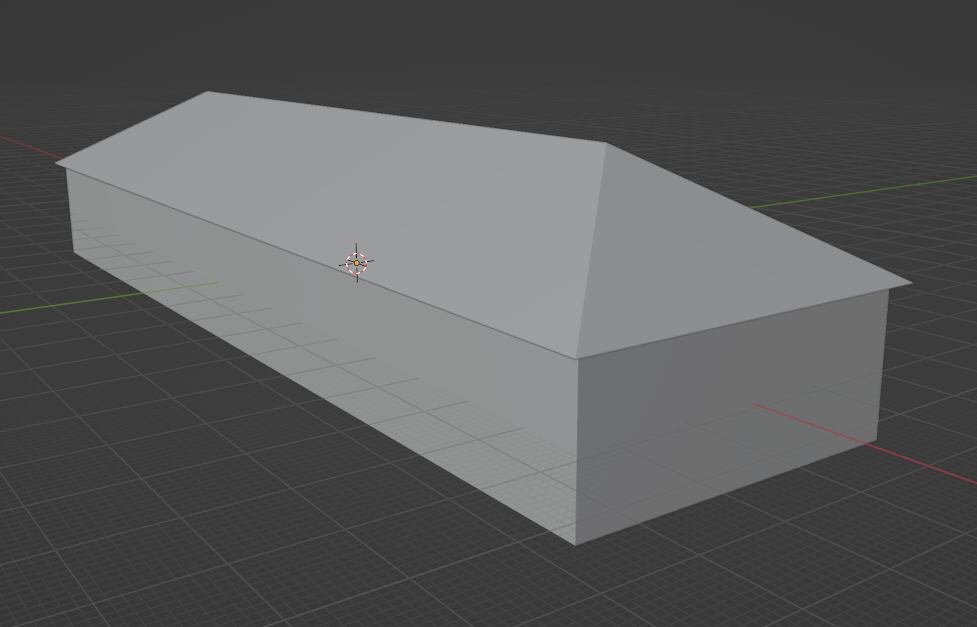
Next the roof. Duplicate the first box, increase the width and height by 2 to give the overhang (quite generous on this building), and then guess the roof height, based on the angles. Then go into Edit mode. Top right there are button that will enable symmetry - do that for X and Y. Then drag one of the top corners into the middle, to create the hipped roof. This works best if you type exact numbers in, and join the vertices together where they meet.
At this point you need to check the basic shape looks in proportion, so go back and compare with the original. This building is just a box with a roof; usually there is more to it at this stage!
Now we need to hollow it out. The best way is to duplicate each shape we already have, and use that to subtract from the original. For the bottom, reduce the width and length scale by 1.5, add a bit to the height, and then subtract that from the original. For the roof, just lower the duplicate by 2 and subtract.
Then create a bunch of new cubes, and use them to cut holes in the walls for doors and windows.

You may be tempted to apply the modifiers at this point, but I suggest not; if the windows need adjustment it is easier to move the cutting cube, rather than the hole. However, it is a good idea to move all the cutters to their own collection so you can hide them.
Detailing
Now all we have to do is detail it! Actually, this is the bit that takes a long time.
You need to decide what you want to include and what you will add later after printing. You also need to be aware of what will actually be visible in the final model.
With regards to brickwork, start with a cube. Go into Edit mode, and resize, so it is longest along the x-axis and the right size. Still in Edit mode, duplicate it, and move the duplicate above the original, and half a length along the x-axis. Then in Object mode, do Add modifier - Generate - Array; set the Factor x to about 0.7. Then do Add modifier - Generate - Array again; set the Factor x to 0, and the Z to about 1.1. Adjust appropriately.
For each wall, copy that object, and place it again the wall (obviously rotate if necessary). Adjust the Count for the two modifiers so it covers the area. Then apply both modifiers, and edit individual bricks to allow for windows, etc.
Slates and tiles are similar, but considerably more fiddly where rooves meet because of the angles.
When it is all done, it should look like this.

Preparing for 3d Printing
I decided to put two internal walls in to strength it and stop the sides bowing. You need walls to be about 1.5 mm thick in my opinion for a model this size.
Anything over 3 mm thick should ideally be hollow, and they also need to be able to drain. In this case the air conditioning units and the water butts are all hollow, the former being open to the interior and the latter open at the bottom.
I also checked the faces to ensure they were all orientated correctly (see here).
I decided to print in two parts - the walls and the roof. The roof will requires a lot of supports while printing - it will be a veritable forest under there! Printing it separate reduces the wasted resin and also stops supports for the roof interfering with the walls, though the downside is that it may not print exactly, and I could end up with a gap.
To facilitate this, I moved the parts in the roof into their own collection, then inspected each collection in isolation to ensure no part overlapped between the two.
Transferring to the printer
Each collection could then be exported to STL file - remembering to select all of it and to tick "selection only" in the export dialog.
I then opened the STL file up in MS 3D Builder, checked I had exported what I wanted, and then let it repair the file. It took a long time, especially the roof; bricks and tiles give it quite a work out! Once done, I saved to a different folder to keep repaired STL files distinct (some people give it a different name).
The repaired STL files could then be dragged into Chitubox. Chitubox is free software for converting STL files - which define your model as a number of triangles - into the CTB format the printer understands, with the model sliced into each layer. The CTB file is tailored to the printer and to the resin by the way.
At this point I found I had to reduce the size 5% to fit the printer! But that is easy in Chitubox.
I now needed to choose the orientation and add supports. I am no expert on this, but for most things I print them upright, and let Chitubox add the supports it thinks. For small things, say up to 5 cm across, I use light supports, but for something like this I use medium. It is usually a good idea to put extra in the corners, as that is where the most stress is while printing.
That was fine for the roof, but for the walls I found it put it supports all over the place, trying to support individual bricks I suspect, so I did that by hand. Again, extra supports at the corners.
This is how it looked in Chitubox.

Printing!
It took about two hours to print, with no way for me to see how it is doing. Print time depends on how tall the print is, and for longer prints, it will emerge from the vat of resin, allowing you to check if anything is there.
And it can be a bit hit-and-miss. Corners fail to stick to the build plate properly, or supports fails, and other issues too. I had to print the roof three times, and ended up doing it tilted at 45 degrees to get it to work, and even then the rear roof is a bit rough, but I decided it was good enough. In the second print I got something across the solar panels on the roof; I guess debris sticking to the model during washing, and that is what you see in the image below.
Once printed, the model needs to be washed. The resin I use is best done with iso-propyl alcohol (IPA). I then leave the model overnight to allow the IPA to fully evaporate. It can then be cured by applying UV light for a few minutes, and the supports removed.

Painting
I like to use Warhammer paints; they go on nicely and there is a good range of colours, if bizarrely named. I used their black primer, then skaag brown for the brick, and dawnstone for the slate. Other details were then picked out.
They do something called "Ardcoat" which gives a high gloss for the solar panels.
This is the end result...


Comments
Post a Comment